- 17Oct2024
- Updated page to reflect current dynamic loading of JSON exercise files.
- 11Sep2024
- Added a halfway beep during long segments.
©2026 Chris McWain
August 21, 2024 at 16:25
Updated 17 Oct 2024
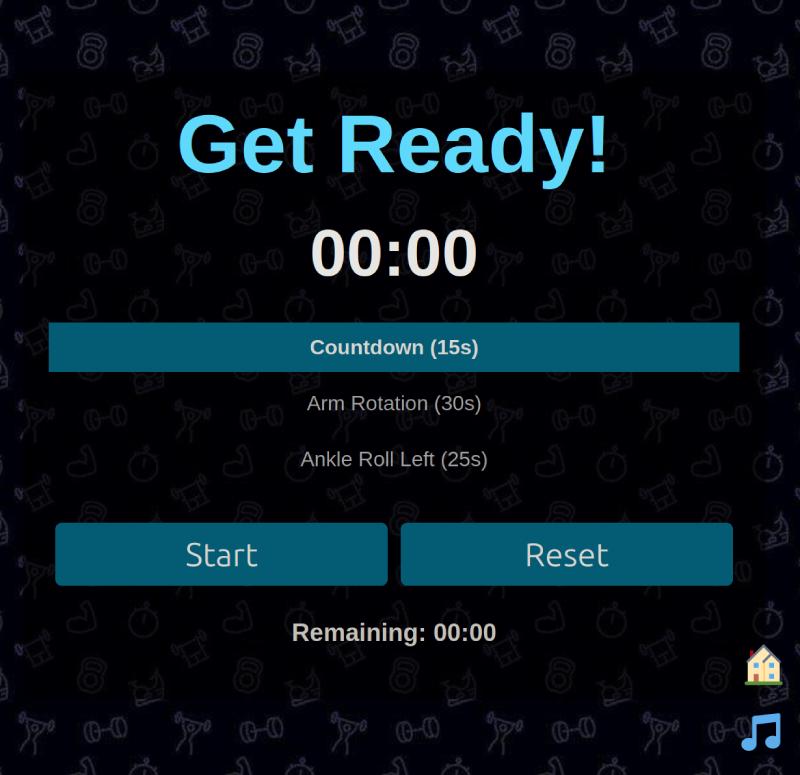
What we have here is a minimal, yet functional exercise timer. I’ve been using this nearly every morning as replacement for tracking my sets.
Current Features
If you want to take it for a test drive, have a look at files.mcwain.net/exercise.
I’ve made some massive changes recently and they needed highlighting. Now, not only is it easier to manage and scale, but there are some new features that are pretty neat. Feel free to copy and use for your own purposes. If this makes your life even the slightest bit better, I’ll consider it a win. As always, this page will update as changes are made.
First, let’s start with the landing page. This will be our starting framework. The sections in the div “category” can be modified to your own needs.
index.html
<!DOCTYPE html>
<html lang="en">
<head>
<meta charset="UTF-8">
<meta name="viewport" content="width=device-width, initial-scale=1.0">
<title>🏃♂️ Let's Do This! 💪</title>
<link rel="stylesheet" href="styles-landing.css">
</head>
<body>
<div class="container">
<h1>Exercise Routines</h1>
<div class="categories">
<div class="category">
<a href="#pilates-yoga">🧘 Wellness</a>
<div class="routines" id="pilates-yoga">
<a href="go/x.html?set=stretch">Basic Stretch</a>
<a href="go/x.html?set=yoga">Good Morning Yoga</a>
<a href="go/x.html?set=meditation">20 min. Silent Meditation</a>
</div>
</div>
<div class="category">
<a href="#cardio">🏃♂️ Cardio</a>
<div class="routines" id="cardio">
<a href="go/x.html?set=walk">Light Treadmill Walk</a>
<a href="go/x.html?set=elliptical">Morning Elliptical</a>
<a href="go/x.html?set=running">Short Interval Running</a>
</div>
</div>
<div class="category">
<a href="#strength">💪 Strength</a>
<div class="routines" id="strength">
<a href="go/x.html?set=strength">Easy Upper Body & Core</a>
</div>
</div>
</div>
</div>
</body>
</html>

This next one is where our timer UI lives. First, we’re going to create a sub folder called go, name our timer HTML file x.html, and place it in the newly created go sub folder. Here you can see where we link to our sounds, set defaults for the page’s timer, and pull in various Javascript files we’re using. I’m only going to cover script.js here since the others are custom bonus features.
x.html
<!DOCTYPE html>
<html lang="en">
<head>
    <meta charset="UTF-8">
    <meta name="viewport" content="width=device-width, initial-scale=1.0">
    <title>🥊 Workout Timer 🔥</title>
    <link rel="manifest" href="/manifest.json">
    <link rel="stylesheet" href="styles.css">
    <style>
        .music-icon {
            font-size: 30px;
            cursor: pointer;
            position: fixed;
            bottom: 20px;
            right: 20px;
        }
        .music-icon:hover {
            color: #ff6347;
        }
    </style>
</head>
<body>
    <div class="container">
        <div id="currentExercise" class="current-exercise">Get Ready!</div>
        <div id="nextExercise" class="next-exercise"></div>
        <div id="timer" class="timer">00:00</div>
        <ul id="exerciseList" class="exercise-list"></ul>
        <div class="controls">
            <button id="startStopBtn">Start</button>
            <button id="resetBtn">Reset</button>
        </div>
        <div id="totalRemainingTime" class="timer">Remaining: 00:00</div>
    </div>

    <audio id="beepSound" src="notification.wav"></audio>
    <audio id="countdownBeep" src="ding.mp3"></audio>
    <audio id="halfwayBeep" src="halfwayBeep.mp3"></audio>

    <div class="home-icon" onclick="goHome()">
        🏠
    </div>
    <div class="music-icon" onclick="openWebamp()">
        🎵
    </div>

    <script src="goHome.js"></script>
    <script src="script.js"></script>
    <script src="webamp-config.js"></script>
</body>
</html>
The Javascript that drives this timer is what we’ll focus on next. As a disclaimer, I’m just okay at scripting JS. AI helped me write the engine that drives the timer, but I’ve learned a lot with our informative back and forth. Not that I ever want to be an actual JS developer.
Let’s take it one section at a time. First, we need to set some default values in case our plan breaks. For my purposes, I’m having it default to a basic elliptical workout, but this could be anything you wish. Hopefully you’ll never see it.
script.js
document.addEventListener('DOMContentLoaded', () => {
    let exercises = [
        { name: "Countdown", duration: 15 },
        { name: "Warmup", duration: 300 },
        { name: "Elliptical it out!", duration: 1500 }
    ];
This is where things get cool. Instead of hardcoding all our exercises in a JS file or duplicating web pages, we’re able to keep our set list in their own .json files in our go sub folder. That folder can be called anything, but I picked ‘go’ because it was short, and I’m into the whole brevity thing.
To load any of our exercise JSON files into our timer, this section of the script will let us select one via the URL. In this example, we’re pulling stretch.json by adding ?set=stretch after the /x.html.
    function loadExercises() {
        const urlParams = new URLSearchParams(window.location.search);
        const exerciseSet = urlParams.get('set');

        if (exerciseSet) {
            const fileName = `${exerciseSet}.json`;

            fetch(fileName)
                .then(response => {
                    if (!response.ok) throw new Error('Network response was not cool man');
                    return response.json();
                })
                .then(data => {
                    exercises = data;
                    initExerciseList();
                })
                .catch(error => {
                    console.error('Error loading exercises:', error);
                    alert('Failed to load the exercise set!');
                });
        } else {
            initExerciseList();
        }
    }
We continue by setting variables to be used later. These range from elements used by the timer engine to getting our sound files ready.
    let currentExerciseIndex = 0;
    let timer;
    let isRunning = false;

    const timerElement = document.getElementById("timer");
    const currentExerciseElement = document.getElementById("currentExercise");
    const exerciseListElement = document.getElementById("exerciseList");
    const startStopBtn = document.getElementById("startStopBtn");
    const resetBtn = document.getElementById("resetBtn");
    const beepSound = document.getElementById("beepSound");
    const countdownBeep = document.getElementById("countdownBeep");
    const halfwayBeep = document.getElementById("halfwayBeep");
    const nextExerciseElement = document.getElementById("nextExercise");
    const totalRemainingTimeElement = document.getElementById("totalRemainingTime");
We want to load the sounds early so they don’t struggle to play when called. This was an annoying issue that .load() easily addressed. Again, I ain’t no JS expert, so this is probably 101 for more seasoned developers. The rest of the script is the timer engine, visual changes, and button functionality. You can tell what each does based on their function name.
    beepSound.load();
    countdownBeep.load();

    function updateTimer(seconds, totalSeconds) {
        const minutes = Math.floor(seconds / 60);
        const remainingSeconds = seconds % 60;
        timerElement.textContent = `${minutes}:${remainingSeconds < 10 ? '0' : ''}${remainingSeconds}`;

        // sound cues
        if (seconds <= 6 && seconds % 2 === 0 && seconds > 0) {
            countdownBeep.play();
        }
        if (seconds <= Math.floor(totalSeconds / 2) + 1 && seconds >= Math.floor(totalSeconds / 2) - 1 && totalSeconds > 15) {
            halfwayBeep.play();
        }

        updateTotalRemainingTime(seconds);
    }

    function updateTotalRemainingTime(currentExerciseRemainingTime) {
        let totalRemainingTime = currentExerciseRemainingTime;

        for (let i = currentExerciseIndex + 1; i < exercises.length; i++) {
            totalRemainingTime += exercises[i].duration;
        }

        const totalMinutes = Math.floor(totalRemainingTime / 60);
        const totalSeconds = totalRemainingTime % 60;
        totalRemainingTimeElement.textContent = `Remaining: ${totalMinutes}:${totalSeconds < 10 ? '0' : ''}${totalSeconds}`;
    }

    function startTimer(duration, callback) {
        let seconds = duration;
        updateTimer(seconds, duration);
        timer = setInterval(() => {
            seconds--;
            updateTimer(seconds, duration);
            if (seconds <= 0) {
                clearInterval(timer);
                beepSound.play();
                callback();
            }
        }, 1000);
    }

    function startExercise(index) {
        if (index >= exercises.length) {
            currentExerciseElement.textContent = "Workout Complete!";
            nextExerciseElement.textContent = "";
            totalRemainingTimeElement.textContent = "Remaining: 00:00";
            isRunning = false;
            startStopBtn.textContent = "Start";
            return;
        }

        currentExerciseIndex = index;
        const exercise = exercises[currentExerciseIndex];
        currentExerciseElement.textContent = exercise.name;

        const nextExercise = exercises[currentExerciseIndex + 1];
        nextExerciseElement.textContent = nextExercise ? `Next: ${nextExercise.name}` : "";

        highlightCurrentExercise();

        startTimer(exercise.duration, () => {
            startExercise(currentExerciseIndex + 1);
        });
    }

    function highlightCurrentExercise() {
        exerciseListElement.innerHTML = '';

        const start = Math.max(currentExerciseIndex - 2, 0);
        const end = Math.min(currentExerciseIndex + 3, exercises.length);

        for (let i = start; i < end; i++) {
            const li = document.createElement("li");
            li.textContent = `${exercises[i].name} (${exercises[i].duration}s)`;
            if (i === currentExerciseIndex) {
                li.classList.add("current");
            }
            li.addEventListener("click", () => {
                if (!isRunning) {
                    currentExerciseIndex = i;
                    highlightCurrentExercise();
                }
            });
            exerciseListElement.appendChild(li);
        }
    }

    function startStop() {
        if (isRunning) {
            clearInterval(timer);
            isRunning = false;
            startStopBtn.textContent = "Start";
        } else {
            isRunning = true;
            startStopBtn.textContent = "Stop";
            startExercise(currentExerciseIndex);
        }
    }

    function reset() {
        clearInterval(timer);
        currentExerciseIndex = 0;

        updateTimer(0, exercises[currentExerciseIndex].duration);
        currentExerciseElement.textContent = "Get Ready!";

        updateTotalRemainingTime(0);

        highlightCurrentExercise();
        isRunning = false;
        startStopBtn.textContent = "Start";
    }

    function initExerciseList() {
        highlightCurrentExercise();
    }

    loadExercises();

    startStopBtn.addEventListener("click", startStop);
    resetBtn.addEventListener("click", reset);
});
Now that we are through the difficult part, let’s move on to the UI and design of this thing.
styles.css is the file that manages how everything looks. Back in my day, we added formatting directly to the html file, and we liked it! Now, we have fancy stylesheets that allow entire blocks of html to be formatted however we want. If you look back at index.html, the CSS file was included in the <head> as
<link rel="stylesheet" href="styles.css">
CSS files are where we apply styles to the sections we created in our HTML. For example, we can change the appearance of our buttons by adding something like this in the styles.css file:
button {color:#000, margin: 1px;}
The more you get into CSS as a designer, the more you’ll find things like this hysterical:
styles.css
body {
    font-family: Arial, sans-serif;
    background-image: url('wallpaper.jpg');
    background-size: repeat;
    background-position: center;
    color: #ffffff;
    display: flex;
    justify-content: center;
    align-items: center;
    height: 100vh;
    margin: 0;
    overflow: hidden;
}

.container {
    text-align: center;
    width: 90%;
    max-width: 800px;
    background: rgba(0, 0, 0, 0.6);
    padding: 20px;
    border-radius: 10px;
    box-sizing: border-box;
}

.current-exercise {
    font-size: 10vw;
    margin-bottom: 20px;
    font-weight: bold;
    color: #61dafb;
}

.next-exercise {
    font-size: 5vw;
    color: #ffffff;
    margin-bottom: 10px;
}

.timer {
    font-size: 8vw;
    margin-bottom: 20px;
    font-weight: bold;
}

.exercise-list {
    list-style: none;
    padding: 0;
    margin-bottom: 20px;
    max-height: 250px;
    overflow-y: auto;
}

.exercise-list li {
    padding: 10px;
    margin: 5px 0;
    border: 1px solid #ffffff;
    cursor: pointer;
    opacity: 0.7;
}

.exercise-list li.current {
    background-color: #61dafb;
    color: #000;
    font-weight: bold;
    opacity: 1;
}

.controls {
    display: flex;
    justify-content: space-around;
    flex-wrap: wrap;
}

button {
    padding: 10px 20px;
    font-size: 4vw;
    cursor: pointer;
    border: none;
    background-color: #61dafb;
    color: #000;
    border-radius: 5px;
    margin: 5px;
    flex: 1;
}

button:hover {
    background-color: #21a1f1;
}

@media (min-width: 768px) {
    .current-exercise {
        font-size: 8em;
    }

    .next-exercise {
        font-size: 2em;
    }

    .timer {
        font-size: 5em;
    }

    button {
        font-size: 1em;
    }
}
Inside the go/ folder is where we keep our audio files. You can copy mine, but these can be changed to whatever you wish. I found the site Pixabay is an excellent resource for this stuff. You could also use something like the Sounds Resource to grab video game sounds.
The last thing we’ll cover is our exercise JSON files. Let’s look at our current, easy upper-body workout:
strength.json
[
    { "name": "Countdown", "duration": 15 },
    { "name": "Jumping Jacks", "duration": 35 },
    { "name": "Rest", "duration": 10 },
    { "name": "Shoulder Raise Lateral", "duration": 35 },
    { "name": "Rest", "duration": 10 },
    { "name": "Shoulder Raise Front", "duration": 30},
    { "name": "Rest", "duration": 10 },
    { "name": "Bicep Curl Left", "duration": 45 },
    { "name": "Rest", "duration": 10 },
    { "name": "Bicep Curl Right", "duration": 45 },
    { "name": "Rest", "duration": 10 },
    { "name": "Triceps Dip", "duration": 35 },
    { "name": "Rest", "duration": 10 },
    { "name": "Butterflies", "duration": 35 },
    { "name": "Rest", "duration": 10 },
    { "name": "Dumbell Chest Press", "duration": 35 },
    { "name": "Rest", "duration": 10 },
    { "name": "Arnold Presses", "duration": 35 },
    { "name": "Rest", "duration": 30 },
    { "name": "Situps", "duration": 50 },
    { "name": "Rest", "duration": 20 },
    { "name": "Pull Ups", "duration": 20 },
    { "name": "Rest", "duration": 20 },
    { "name": "Jump Rope", "duration": 30 }
]
As you can see it’s pretty straight forward. Just make sure that when you edit it, that you maintain the JSON formatting. This means wrapping a section in { and }, keep words in quotes, and separate sections with a comma. Just don’t add a comma at the end. If you want to add an additional exercise routine, copy any of the json files, rename them and edit the content accordingly. Just make sure that you add a link to the original index.html page so you can find it later.
Let’s say I want to add “Leg Day” to our list of timers. I’ll copy strength.json above, rename it to legday.json, and edit the file to focus on legs and their times. After, we’ll make our index.html look like this:
<div class="category">
   <a href="#strength">💪 Strength</a>
   <div class="routines" id="strength">
      <a href="go/x.html?set=strength">Easy Upper Body & Core</a>
      <a href="go/x.html?set=legday">Don't skip leg day bra!</a>
That’s it! Relatively simple stuff. The phone app I was previously using was real difficult to manage long routines, and was restricted in setting times. This way, we have total control over every detail and it can scale very easily.
Discussion here: https://x.com/cmcwain/status/1826420286608306302
Questions or comments?