©2026 Chris McWain
Self-Host Your Own Google Photos
October 12, 2025 at 18:50
Getting Your Photos Out of Google’s Hands
Cloud providers like Google love to grab as much data as possible, and we’re all too willing to hand over our most personal information for the sake of convenience. Over time, convenience turns into dependency. That dependency keeps you trapped in their closed ecosystems where these companies can charge you monthly. They use your hesitation to walk away as an excuse to increase the price and take greater liberties with your personal data.
Thankfully there are better options out there. It only takes a bit of curiosity and motivation to stay out of their reach. Let’s talk about how to move your photos into a system that’s free, automatic, and private.
Managing Photos on Your Own Hardware
Years ago, I built a 100TB NAS that keeps our family’s data safe. It runs TrueNAS - a free operating system that handles data redundancy and management. The latest version, TrueNAS Scale, makes it easy to install self-hosted apps like Immich - a photo management platform that feels familiar if you’ve used Google Photos, but it keeps all your pictures local and private.
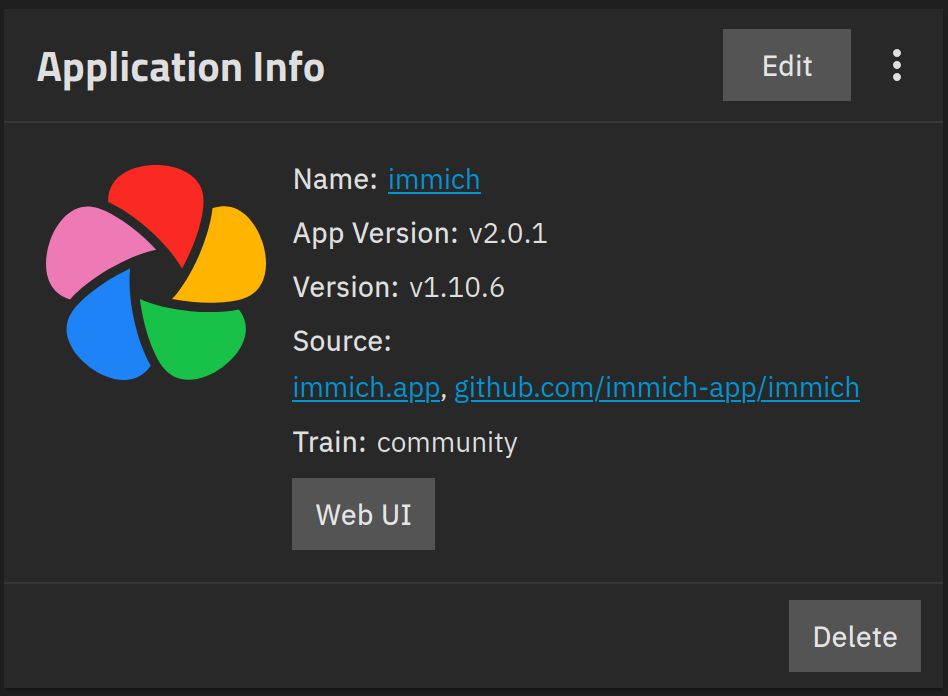
Setup is simple in TrueNAS. Just give the app a name, create a few passwords, and point it to your photos folder. There’s also an optional integration with Hugging Face for face and object recognition through machine learning. If that sounds overwhelming, you can skip that part and everything still works fine. I don’t bother myself, but some people might want to play with it.
Just because my setup is a 10-drive power-hungry monster doesn’t mean yours has to be. TrueNAS can run on just about any spare PC or laptop. A laptop even has a built-in UPS (Uninterruptible Power Supply) thanks to its battery, which helps keep your hardware safe during power outages. You’ll want at least 8GB of RAM, but 16GB or more will make things smoother. If you don’t have old hardware sitting around, MinisForum mini-PCs are compact, quiet, and perfect for the job. I have quite a few of them myself for different tasks.
How to Sync Photos with Syncthing
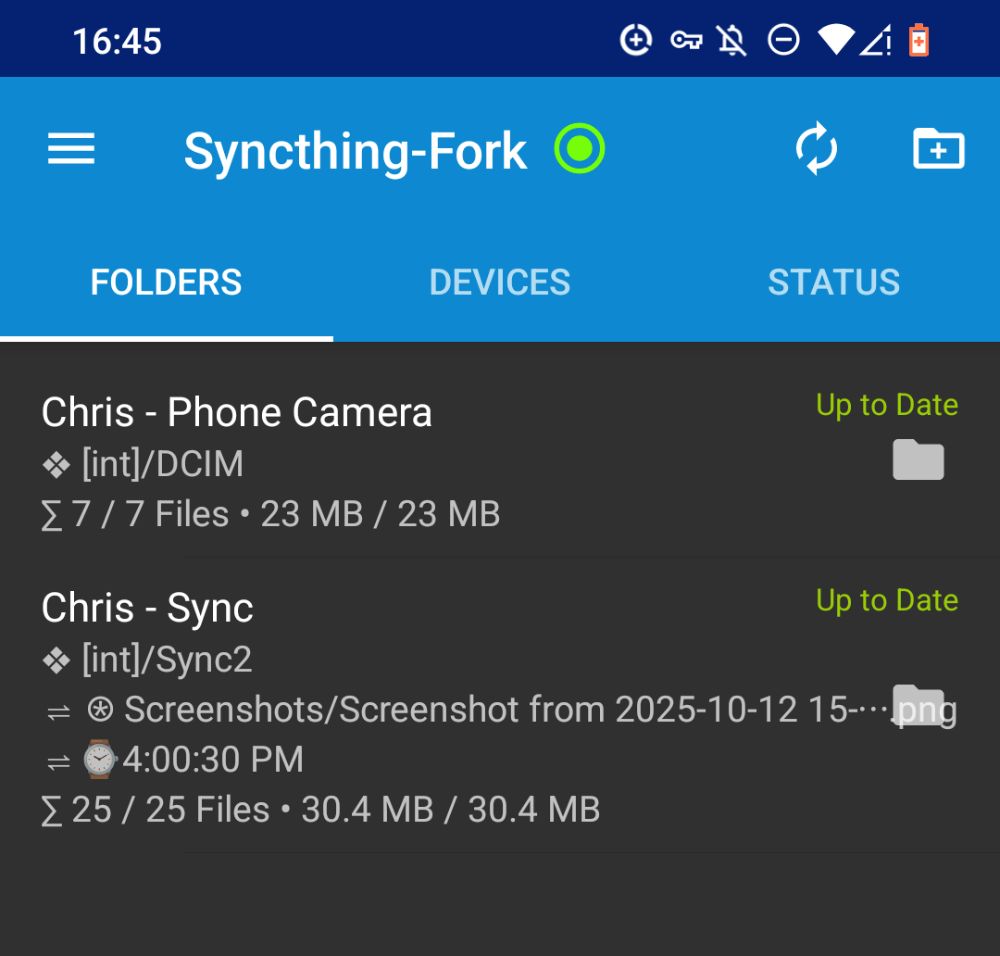
Once you get into an Apple or Google ecosystem, they try to control everything about your digital life. If you’re on Android, recent changes have limited what background apps can do. The official Syncthing app still works, but a community fork restores full functionality. This means that the app can continue syncing in the background without Google telling them not to.
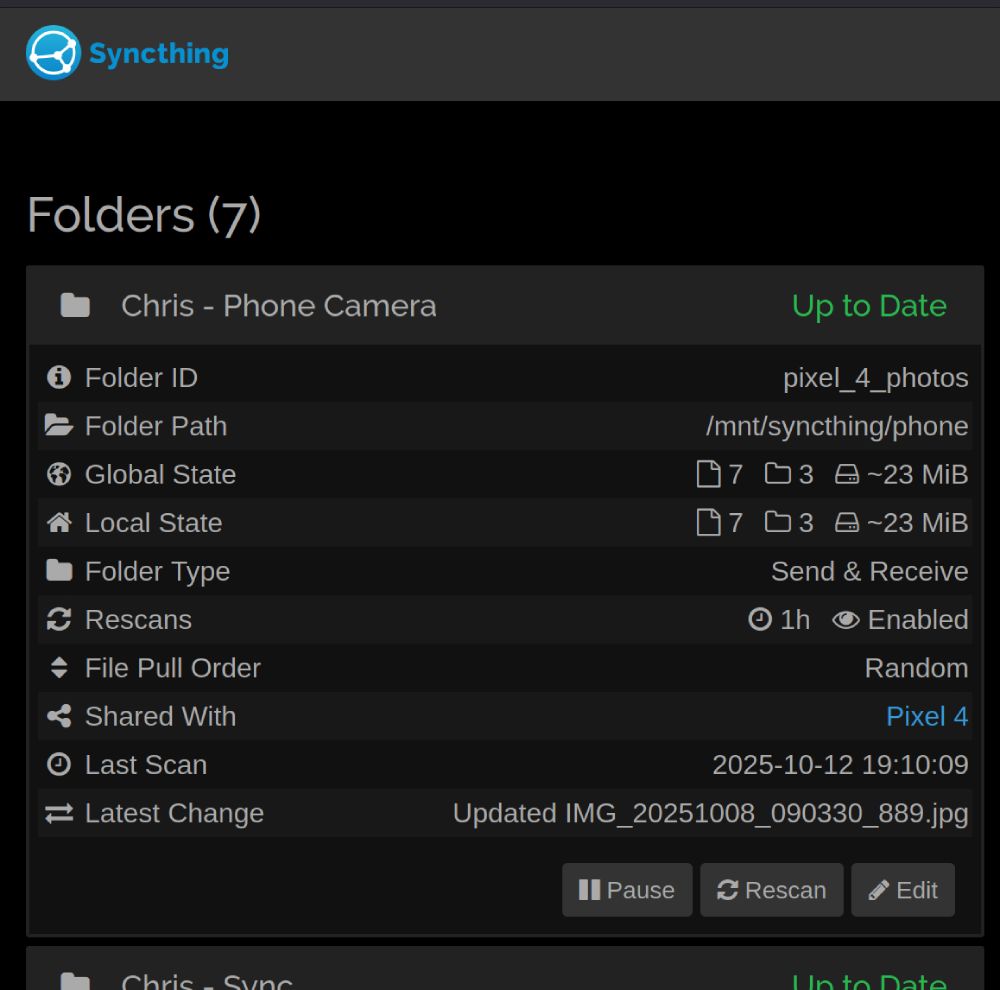
Syncthing keeps folders synchronized across all your devices. For example, I have a folder named Sync on my phone, laptop, and NAS. Whenever a file changes on any of those devices, Syncthing monitors and automatically updates all the others.
Even if you don’t end up using Syncthing for photos, it’s incredibly powerful. For example, I recently needed to return an Amazon box with a FedEx label. I downloaded Amazon’s label into my desktop’s Sync folder, drove to FedEx, and opened the same file on my phone when I got there. No emails or flash drives were needed. It’s simple, automatic, and generally reliable.
Automating Photo Uploads from Your Phone
To make Syncthing part of your photo workflow, point it to your phone’s Camera “DCIM” folder. Every photo you take will automically sync to your NAS, and Immich will automatically import and organize it.
I just discovered while writing this that Immich also has a mobile app for Android and iOS. This is cool because Immich’s web version on mobile sucks. The native app makes it feel more like an actual Google Photos replacement.
Self-hosting opens up a lot of possibilities. You could have a digital picture frame that reads from your NAS and displays new photos as soon as they’re taken. It’s an easy way for grandparents or family members to see what’s happening in real time. For advanced users, you can script photo archives and keep your phone’s storage from overloading. My phone is currently empty by design. If my phone is lost or stolen, it won’t matter. Everything is automatically backed up on the NAS and photos remain viewable through Immich.
Exporting Your Google Photos from Takeout
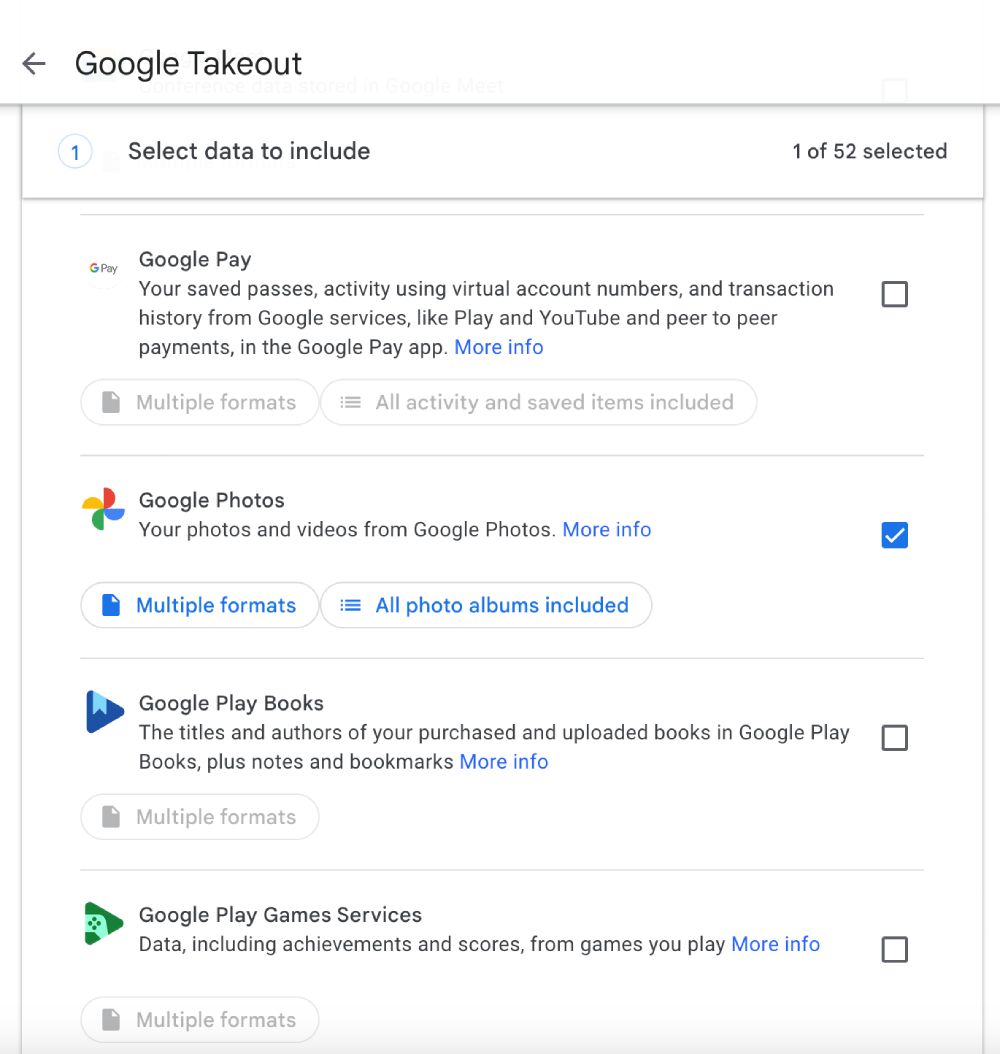
Getting your photos out of Google Photos is easy-ish with Google Takeout.
- Go to takeout.google.com
- Deselect everything except “Google Photos”
- Choose a format like ZIP or TGZ and archive file size (10GB is usually fine)
- Google will email you when your archive is ready to download
- Follow the link, download, wait, and repeat until all downloads are complete
Once downloaded, extract the files and drop them into Immich’s upload folder. Immich automatically reads the metadata, such as dates, albums, and locations, and builds your new library without you having to organize anything.
Be aware that larger archives can be a pain in the ass. Google gives you a limited window to download them, and slow connections can make the process painful. My wife has more than 1.6TB of kid photos, and it was a nightmare to get them all downloaded before the links expired.
Simple Ways to Backup Your Photos
This part tends to scare people, but it shouldn’t. Backups don’t need to be expensive or complicated. The goal is to have at least one other copy of your photos somewhere safe. I always recommend the 3-2-1 method of backup for critical data. That means three copies of your data, on two different devices, and one of them is off-site - meaning not at your home.
- Local backup: Plug in an external drive and have TrueNAS copy your photo folder weekly. This is easy and allows for you to grab in emergencies.
- Cloud backup: Use an encrypted cloud service like Backblaze B2 for automatic off-site backups. TrueNAS has this functionality built-in and it’s trivial to deploy.
Once it’s set up, you don’t have to think about it again. Just keep in mind that Syncthing isn’t technically a backup. It’s a sync tool. If you delete something on one device, it could potentially be erased everywhere. Backups are put in place to protect you from accidents and hardware failures. Syncthing has multiple options to help address data loss, but you should definitely have a plan in place. Make sure you test every so often too.
Securing Your Setup
Tools like Cloudflare Tunnels, TailScale, or a self-hosted instance of Wireguard make it easy to safely access your NAS without exposing it to the public internet. Combine Cloudflare Tunnels with a custom domain, such as photos.{domain}.com, and you’ll have an encrypted connection to securely access your app from anywhere. Domains with Porkbun run for ~$10/year and they make things simple. All my domains are with them and they’re my top recommendation for domain registrars.
If multiple people use Immich, give each of them their own account. TrueNAS can also take automatic system snapshots so you can roll back changes if something breaks.
Final Thoughts
I love that we can host our own services. Managing your own data means you save money, maintain privacy, and have full control over what’s yours. Let me know if this has helped or if you have any questions along on your journey.
Questions or comments?