©2026 Chris McWain
Custom LED Wall Art
March 19, 2025 at 11:14

Goal
- Make my own Digital Pixel Art / Picture Frame
- Automate it, but keep it customizable
- Keep it away from an app or cloud service
BOM
- Addressable RGB LED panels
- 3D printer and STLs (1, 2)
- Adafruit Sparkle Motion controllers with 0.16.0-alpha firmware. 1
Background
There once was a “Divoom Pixoo” LED frame that sat next to my TV for years. Changing images was a hassle, and the device was tied to a Chinese cloud service via an app. Although it was functional - made of cheap, low-quality plastic - it certainly wasn’t pushing the boundaries of what $50 could buy. Eventually, it died, and none of its parts were salvageable.

Since then, the idea of making a new one has been bugging me. How hard could it be? I’m already ordering every LED doodad from AliExpress, and building a grid, diffuser, and case to house the electronics is trivial. With plenty of design options available on Thingiverse and Maker World, there’s no need to start from scratch. Although I used the STLs linked above, they had to be customized to work with different hardware and project requirements.
The script below is the interesting part. We’re using WLED on the new Sparkle Motion from Adafruit, which makes the process significantly easier than using an ESP32 alone. These boards can drive both 5V and 12V directly from the board without the need for separate power management.
The real trick was figuring out how to communicate pixel art to the board. By reverse-engineering WLED’s Pixel Art Converter, we discovered that it works similarly to other projects like our Digital Lava Lamp. With some Python, we can take an image, convert it to a 16x16 RGB grid, and sample each pixel. These values can then be converted to hexadecimal and sent over to the board.
The script below does all that, and selects from a random list of 16x16 images that you provide. I grabbed a bunch of assets from various games since they were already formatted properly.
Python
wallart.py
import requests
import random
from PIL import Image
import datetime

wled_ip = "192.168.1.5"                      # change to your WLED IP
max_brightness = 55                          # (1-255)
segment_id = 0

now = datetime.datetime.now()
current_hour = now.hour + now.minute / 60.0

if current_hour < 6 or current_hour >= 23:   # turn off to keep the room darker
    brightness = 0
    hex_colors = ["000000"] * (16 * 16)
    payload = {
        "on": False,
        "bri": brightness,
        "seg": {
            "id": segment_id,
            "i": hex_colors
        }
    }
else:
    # vary brightness through the day
    if current_hour < 12:
        fraction = (current_hour - 6) / 6
    else:
        fraction = (23 - current_hour) / 11
    brightness = max(1, int(max_brightness * fraction))

    # add your images here
    image_list = [
        "blueled.png",
        "bmo.png",
        "boo.png",
        "yoshi.png"
    ]

    selected_image = random.choice(image_list)
    image = Image.open(selected_image)
    image = image.convert("RGB")            # standardize the input
    image = image.resize((16, 16))          # resize
    pixels = list(image.getdata())          # map hex
    hex_colors = ["{:02x}{:02x}{:02x}".format(*pixel[:3]) for pixel in pixels]

    payload = {
        "on": True,
        "bri": brightness,
        "seg": {
            "id": segment_id,
            "i": hex_colors
        }
    }

url = f"http://{wled_ip}/json/state"
response = requests.post(url, json=payload)  # similar to previous projects
#print(f"Response status: {response.status_code}")
#print(response.text)
Bonus Goal!
- Make a digital clock!
Make my own Digital Pixel Art Picture FrameAutomate it, but keep it customizableKeep it away from an app or cloud service

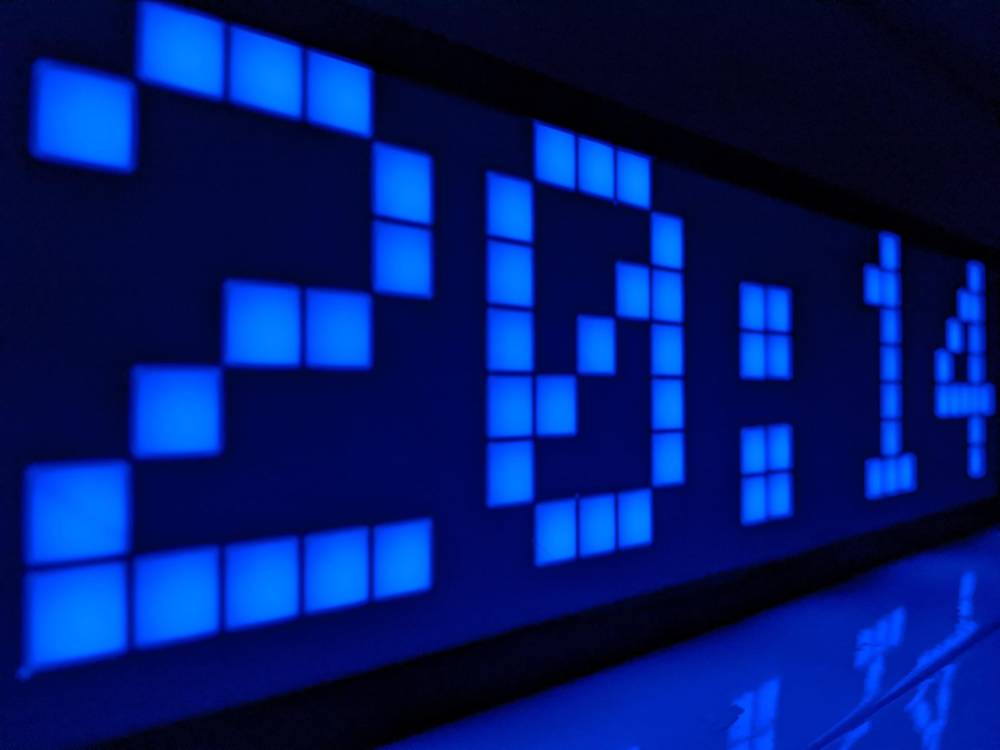
At our Thanksgiving party, one of our guests pointed out how much they disliked my current clock. I think it’s cool because it’s analog and automatically sets the time, but she was right - it’s ugly and looks like it belongs in a classroom or a hospital. Since we already have extra LED panels and Sparkle Motions, why not make a clock?
The key challenge with this assembly was getting WLED to recognize the correct 2D grid configuration. Once that was set, we had a static clock that also matched the room’s colors (pulled from the Tron Lights project).
Both of these projects together cost ~$40 total and I’m very happy with how they turned out. Now I just need an excuse to make more.
-
This should only be temporary until 0.16 is no longer in alpha. You need this firmware so it’ll recognize pins 32 and 33 on the Sparkle Motion. I didn’t want to look for the bin file again, so it’s now on my server. Feel free not to trust it and simply search for “WLED_0.16.0-alpha_ESP32.bin.” I’m not smart enough to do anything nefarious on there anyhow. ↩︎
Questions or comments?